How to make a holographic 3D printer mat from a CD
The holographic substrate for 3D printing has a structure of small protrusions on its surface, which are imprinted on the underside of the printed model. The structure and spacing of the protrusions cause diffraction (decomposition) of white light into the colors of the rainbow. The underside of the model thus acquires the same structure as the substrate and also creates colored reflections. The reflections are created physically, so no color in the form of pigment is used.
Substrates with a holographic structure can be purchased. However, to try transferring the holographic structure to the model, you can also use an ordinary CD (compact disc). The CD contains a structure of protrusions similar to a diffraction grating, which also creates colored reflections.
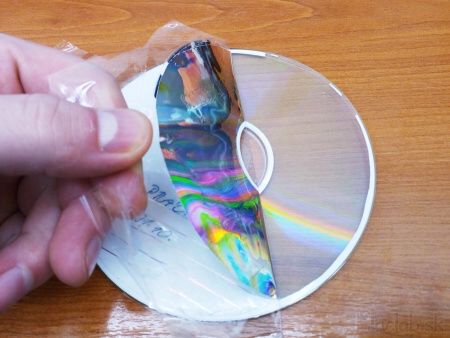
We run a razor blade around the printed side of the CD, about 5mm from the outer edge. Then we tear off the print using adhesive tape. We attach the CD to the 3D printer using adhesive tape.
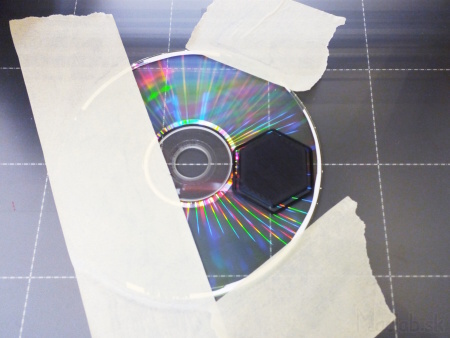
Before printing, the nozzle height needs to be adjusted depending on the thickness of the CD. The model is then printed directly onto the exposed part of the CD.

The diffraction grating structure from the CD is imprinted onto the bottom surface of the printed model. The printed model thus acquires a reflection over the entire surface that was in contact with the CD.
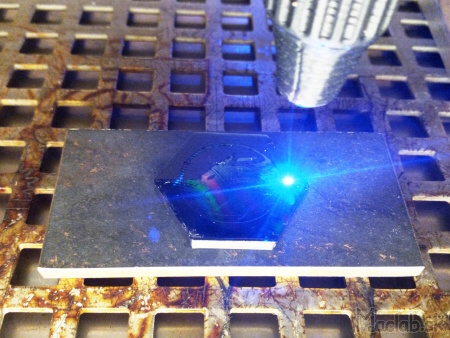
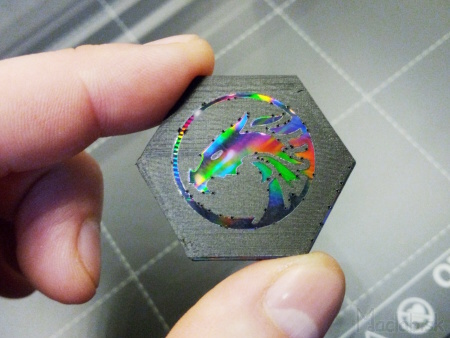
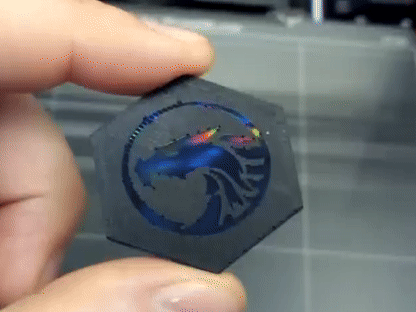
I further modified the surface using a laser. The area where the laser passed melted slightly, melting the protrusions that refracted the light and created reflections. By engraving an inverse image into the plastic surface, areas with a glossy color and a matte dark surface were created.
The dots at the interface of the surfaces were caused by fluctuations in the laser power when switching it on and off. I still have to fine-tune that.
By the way, the transfer of the holographic structure works not only on plastic but also on chocolate.