Test and review of diode laser NEJE DK-8
Laser is a source of monochrome light that, thanks to stimulated emission, concentrates high energy into a narrow beam. By computer control of this laser beam it is possible to engrave images or cut material. Already I wanted to build a laser engraving machine from old napkins. But I was deterred by hardware reprogramming.
Recently, several generations of mini laser engravers appeared on the market. In essence, it's also made of napkin parts, but with all the necessary software and additional hardware. Just mess up and use it. One of them is the lower tested NEJE DK-8 model.
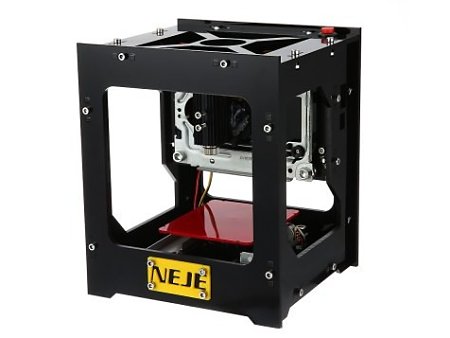
The entire device has an external dimension of 16 x 14 x 19 cm. The source of laser radiation is an LED with a power of 1W and a wavelength of 405nm. The diode is vertically mounted on the rails, and the servo motor moves in the x-axis direction. The horizontal rails are attached to a small table that moves in the y-axis direction. The entire device is powered on 5V with an extension USB cable. The second cable with the mini-USB terminal is connected to the computer. At the top there is a red button that can start or stop the engraving process. The maximum engraving area is 37 x 37 mm.

The engraving software is included on the micro-USB card. The current version can be downloaded online. First, a USB driver is installed. Sometimes antivirus reports a threat, but everything is fine. The program itself is then run as an EXE file. The image you want to engrave will be dragged into the program window. Only raster formats are supported: JPG, BMP, and PNG. The program automatically converts the image to black and white to a size of 500 x 500 pixels. Click "Send to machine" to transfer the image to the engraving machine. By clicking on "Preview", the laser renders the square of the square to which the image will be engraved. The engraving process itself starts with the "Start" button.


The laser then rake the area by the x-axis rows. Where there is a black pixel in the image, the laser stops for a while and burns a black dot to the surface of the material. When it comes to the end of the row x, the tables move in one yo-yo direction and the next line is plotted. This is how the entire surface is sculpted. The resulting image then consists of many small black dots. It takes a few minutes for the entire area to be rendered.

Attaching the engraved item to a table is resolved using rubber bands. This is the first limitation, and that the engraved article can not be too large or heavy to enter the machine and to move the table at all. As for the height of the engraved article, the laser beam can be focused by turning the lens on the diode, but the engraved item should not exceed 2cm. The diode can be unscrewed and shifted higher to give you a few more inches of height.


Engraved into the skin.


Even the smallest QR code is sufficiently legible.


Laser cutting of the carton.
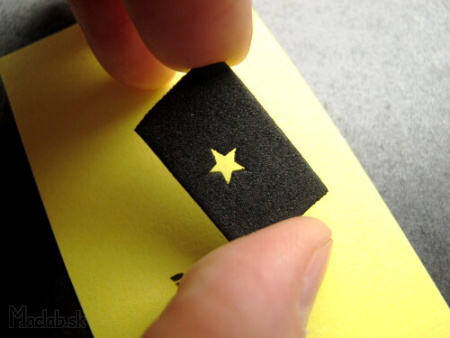
Laser cutting of foam.
Laser resolution
I created a calibration image to fill the entire engraving surface. I plotted the image in paper and then watched under the microscope the size and quality of the engraved pattern.
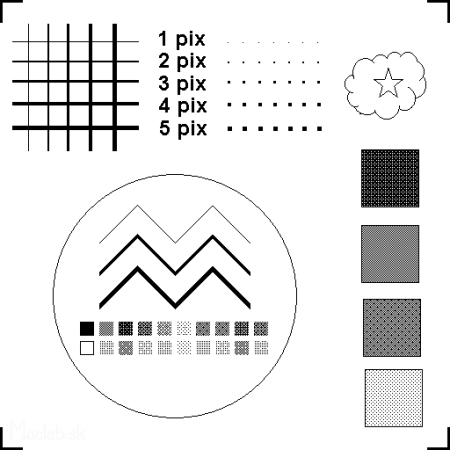
Source image.
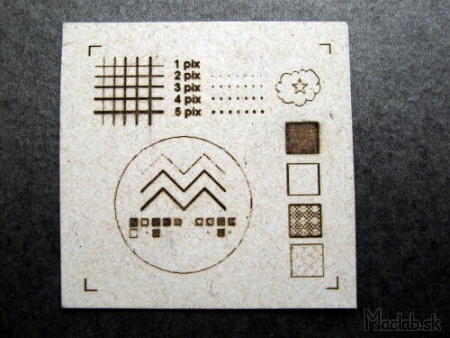
Source image engraved on paper.
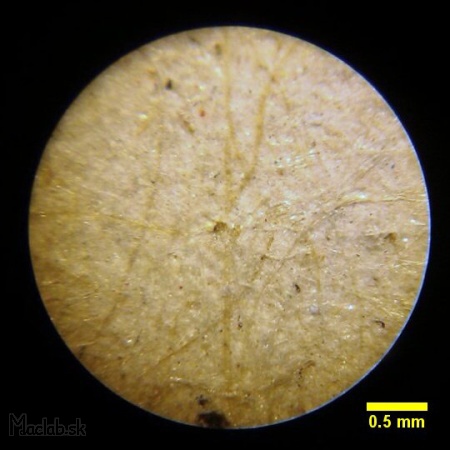
Microscope: Pixel size 1x1 pixels.
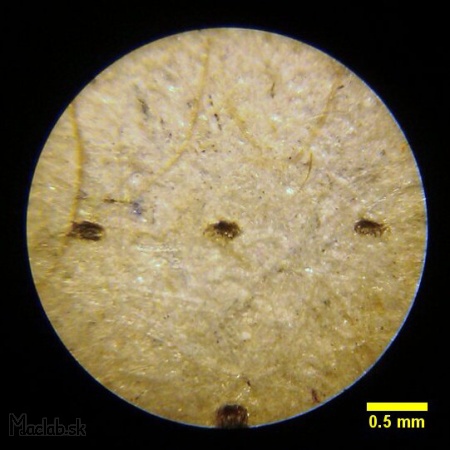
Microscope: Pixel size 2x2 pixels.
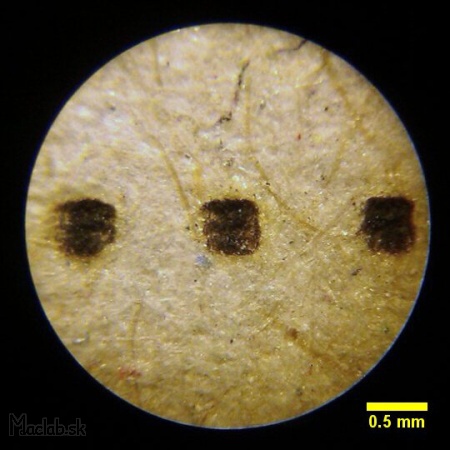
Microscope: Pixel size 5x5 pixels.
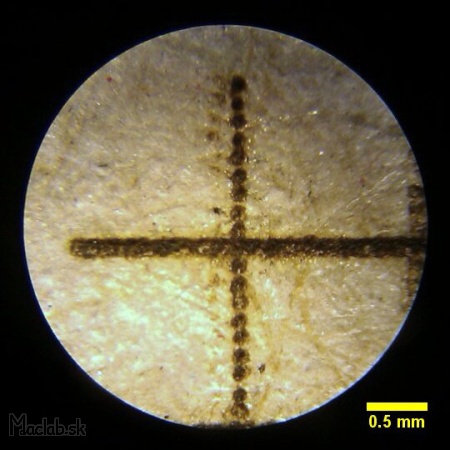
The picture shows the intersection of two lines that have both the same thickness of 1 pixel. The horizontal line appears to be coarser because it was rendered continuously when the individual points are burnt in line x. The vertical line is interrupted because only one sub-frame was drawn, and then the laser continued to the end of the line. The vertical line has weak points on the left side as "spirits". This is probably due to an incorrect synchronization of the retention time before shifting to the next point. This value can be increased in settings, but the total engraving time is then considerably increased due to the wait for each single point.
Exact sizes and dimensions for laser engraving
I have prepared Arial font in various sizes to find out what the smallest font is still legible. The font size is in [pt], but the engraved size is different from the inkjet printer.
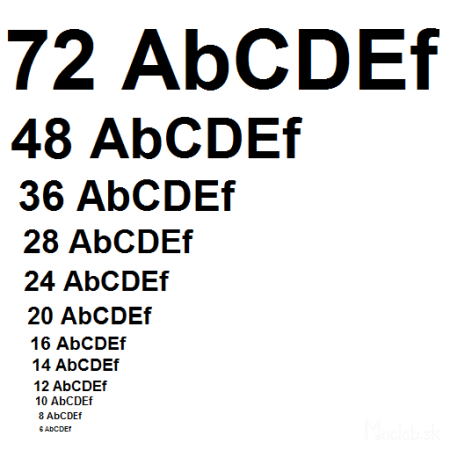
Source font of various sizes.
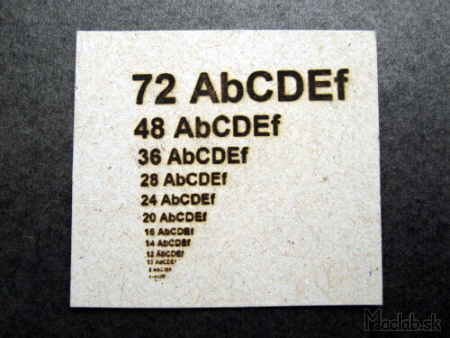
Engraved picture of different font sizes.
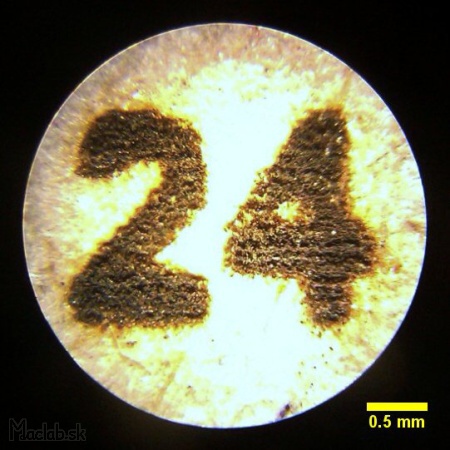
The font size of 24pt real size 1.8mm is still readable.
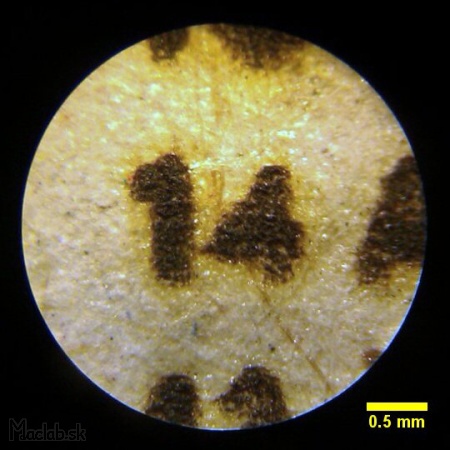
The font size of 14pt is at the limit of legibility and its real size is 1 mm.

The maximum engraving area from edge to edge is 36.76mm, of which: 36.76mm / 500pix = 0.0735mm / pix. In AutoCade, I can create a drawing with exact dimensions and change the scale as needed. So I can create different rulers or measuring instruments of exact dimensions.

The larger image can be divided into several smaller parts and plotted in parts.
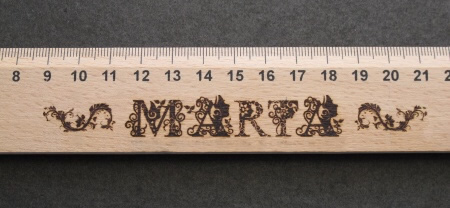
The engraved name on the wooden ruler consists of 4 smaller parts.
Laser power
As for power, this laser diode only works in pulse mode. This means that it is either ON or OFF. However, to control the time after which the laser will burn the point. This value is called Burning time. The longer the laser remains on the point, the more the material surface will burn and become darker. For paper and plastics, a shorter time is required, for hardwood to be set for a longer time.

I prepared the same inscription that I engraved in the carton at different Burning time values and watched how it affected the shade of the font.

Microscope: Burning time = 60.
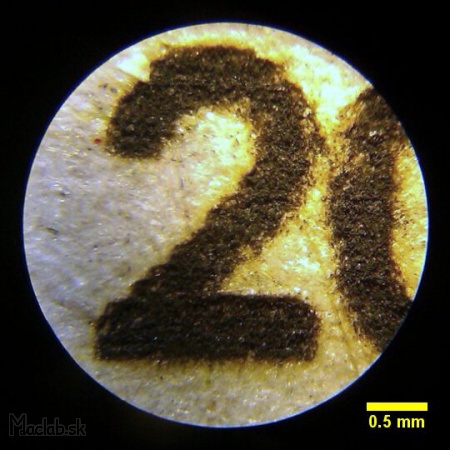
Microscope: Burning time = 20.
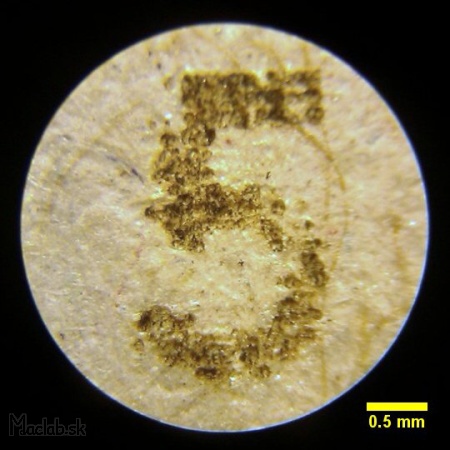
Microscope: Burning time = 5.
Each material is different and therefore the exact Burning time can not be uniquely determined. It is necessary to test for a particular material and then engrave the whole picture. Better to give it a short time, and if the picture is too bright, start the engraving still a second time on the original picture. Indicative values are:
| material | Burning time |
| Plastics | 10 |
| Paper | 15 |
| leather | 20 |
| wood | 40 |
| gum | 60 |
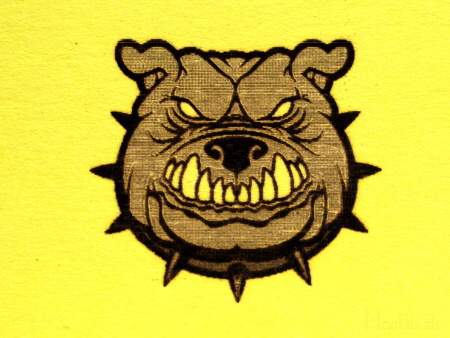
Even in images, the software can not scale the performance of the laser according to the gray shade. The image degrades to a monochrome black and white format. This means either a pixel assigns a black or a white color. Nothing in between. In part, it can be bypassed by spreading the image in some other photo on different shades of gray. For example, the image of a dog is decomposed into dark contours that are engraved in dark color using high Burnint time. Then an internal surface with a low burning time is engraved, which will cause the area to become darker but light gray.

It's more complicated for photos. There are many shades of gray that create detail and plasticity in the picture. Before engraving, the photo needs to be edited in the photo shadow. It's similar to engraving on banknotes or images in old printed newspapers. The photoshop prints the image using light and dark spots. For exapple in GIMP: image - mode - index - palete:1Bit, ditering: Floyd–Steinberg.

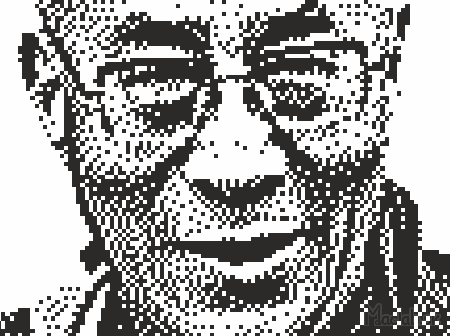
The image shadowed by posterization.
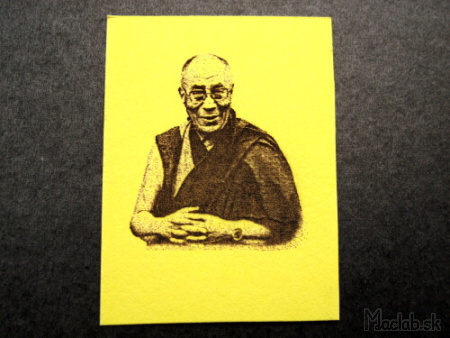
Engraved posterized photo.
Engraving into Plexiglas
Engraving into translucent materials such as polycarbonate or plexiglass is not possible under normal conditions. The laser beam passes through the translucent material and burns the image into the pad.

On the surface of the material, it is enough to apply an invisible layer. Just a fix on a white board. The laser beam strikes the paint layer and turns to heat. The heat melts the surface of the plastic and binds the pigment from the fastener. This allows you to create color images.


Multicolored engraving with plastic pigmentation.
Engraving into glass

The diode has too little power to engrave the glass. On the glass, however, we can stick the adhesive tape and emboss the contours. Apply a glass etching paste to the exposed areas. I flattered the surface directly with hydrofluoric acid.

The covered protected areas remain smooth and uncovered by exposure to acid.
Metal engraving
Metal engraving is difficult for lasers with low power. Metals have a glossy surface that reflects most of the radiation. Metals also have high thermal conductivity, so even a small portion of the absorbed radiation is rapidly dispersed into the bulk of the material. The engraving heat can be a sensitive paste that chemically reacts with metal at elevated temperature, but it is more expensive than the whole of the laser. Fortunately, there is a substitute solution. For example, create a mask for chemical or electrolytic etching.

Wipe the brown adhesive tape evenly onto the degreased metal surface. Darker color absorbs laser radiation better. Where the laser beam strikes the tape, the plastic melts and scraps the metal. This creates a mask for etching.

We will attach a negative pole to the metal. Put the positive pole on a piece of copper wire. On the mask, we drain a little salty water. When we immerse the copper electrode in the liquid, the exposed areas begin to eject. In order for the water to drain away, we can create a small mantinel from the next adhesive tape. More in the article Electrolytic etching .

Tension and time need to be tested. I used to 3V aluminum, 350mA, for 1min. Etching is not very pronounced.
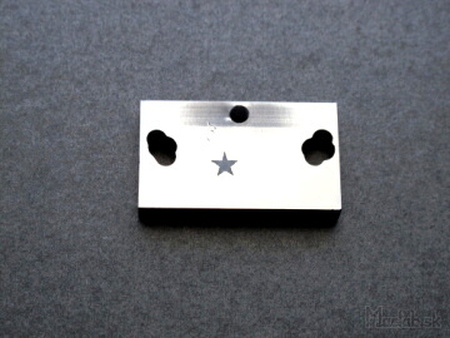
In a second experiment with parameters of 4.5V, 350mA, 3 minutes I got it too deep.
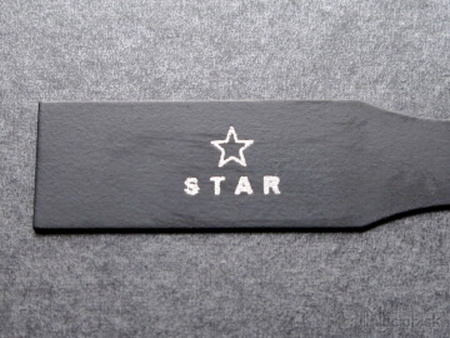
The mask can also be formed with other insulators such as nail varnish or other water insoluble paint. I used a plain black spray. The color at the point of impact of the laser beam worsens and exits the metal, in this case the carbon steel. This can be electrolytically or chemically etched with acid.
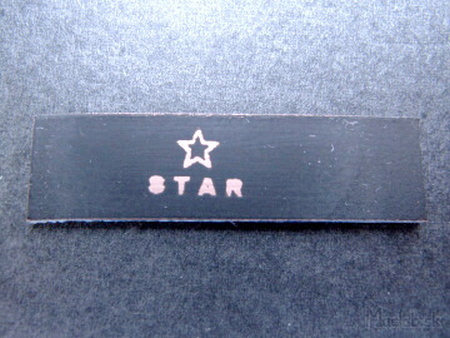
I've also used the same technique on cuprexit - a boarded circuit board. No photoresist, just plain color. However, lesser details are a disadvantage.
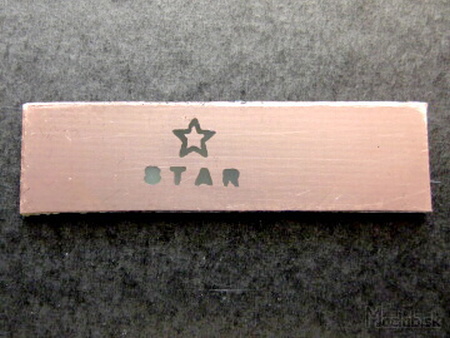
The mask was chemically etched using ferric chloride (FeCl3)

Similarly, I also produce printed circuit boards. Read more in a separate article on the free energy device
Other procedures
Even with this weak laser, additional technological operations such as plunging or milling can be done. Of course, to a limited extent, but there are other uses.

If we want to transfer the mask to another surface, first put the foil on a piece of metal. I've used an adhesive plastic wallpaper. Here we draw the contours of the image. In the place of contour the laser plastic cuts like a cutting plotter.

Put it all over with a paper adhesive tape so that the individual cutouts do not separate from each other.

Using the paper tape, we cut the cut shapes to a new surface, then remove the paper tape.


On the left, spray paint is sprayed over the mask. On the right, the mask protected the glass during sanding. The glass under the mask will remain shiny, with the glass unmade.
Depth engraving

I tried to make a shape stamp. It's not a rubber stamp, but an ordinary rubber for gumming, except black in order to absorb the laser radiation well. You need to create an image with inversion colors to emboss a relief.

Simple shapes are easy to create. Complicated shapes lose details.

When engraving into hard wood, we burn the same picture several times in succession. Thus, at the point of impact of the beam, wood is completely burned, only ashes remain. Clean the surface with a brush, removing the ash and leaving the inscription as a relief embossed to a depth of several millimeters.
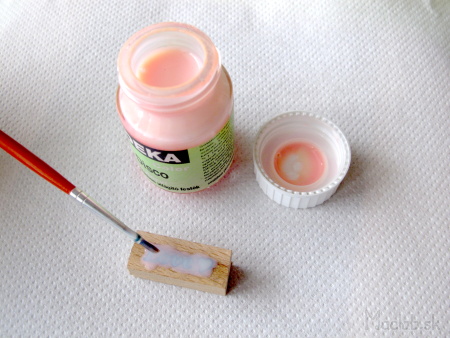
I covered the deep relief with a coarse layer of acrylic paint.
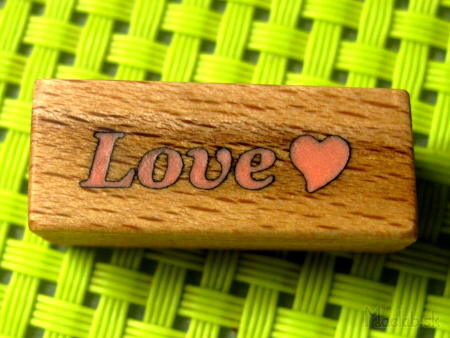
Once the paint has dried, I flatten, peeled, polished and lacquered.
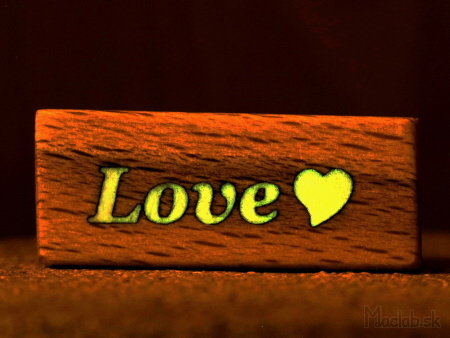
The color is phosphorescent and shines in the dark.
conclusion
The main advantage of this laser is a much lower price compared to professional equipment. Thanks to its small size, the whole device is easy to carry and simple. This results in its great disadvantage and the small dimensions of the engraved surface. Another drawback is the low power that allows direct engraving only on wood and plastics. On the other hand, engraving can also be used in metal or glass when using etching. This laser is therefore particularly suited to the hobby workshop, for example, for the manufacture of labels, measuring devices, printed circuit boards and other indelible labels.
Where to continue: